

How To Set Up Dewalt Planer

The most mutual topic I become asked questions almost is tools. And while I continiously tell everyone I do non like to talk nearly tools every bit I do not want my content to be all almost tools I'chiliad going to have to give in a little and start sharing my thoughts on some of the tools I do own to hopefully alleviate some of the repetitive questions I become asked (that doesn't mean cease sending me questions! I'll notwithstanding answer). This week I'll give you an overview on my planer and setup and hopefully within the next week or ii I'll accept something to share in regards to my tabular array saw.
Since using my planer in my one-half lap bar stools project I've gotten a huge moving ridge of requests to explicate my planer setup. So that's what I'll do here. Simply beginning I'll lightly go over the planer itself and requite some of my thoughts on it.
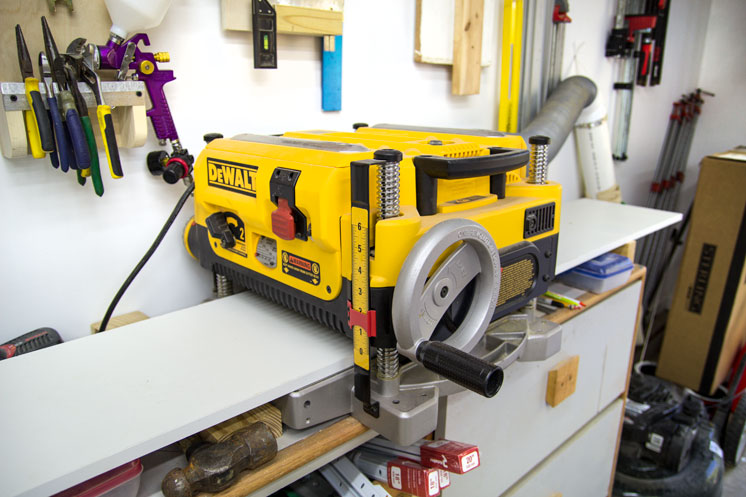
The planer I'm using is a DeWalt DW735. I've had it for well-nigh two years at present and have mixed feelings nigh it. The easiest way to be direct virtually the problems is to practise a little thumbs up thumbs down listing.
Thumbs Upward:
- Strong motor. It chews through a full thirteen" broad slab with relative ease. You tin can hear the motor alter pitch when it is faced with a broad slab but it's never bogged downward on me.
- Top aligning is flawless. No complaints there.
- Has a thickness gauge to let you know where you are at. I take a slice of v/8" melamine shelving in the bed and then I take to subtract 5/8" for an accurate measurement. Not a big bargain.
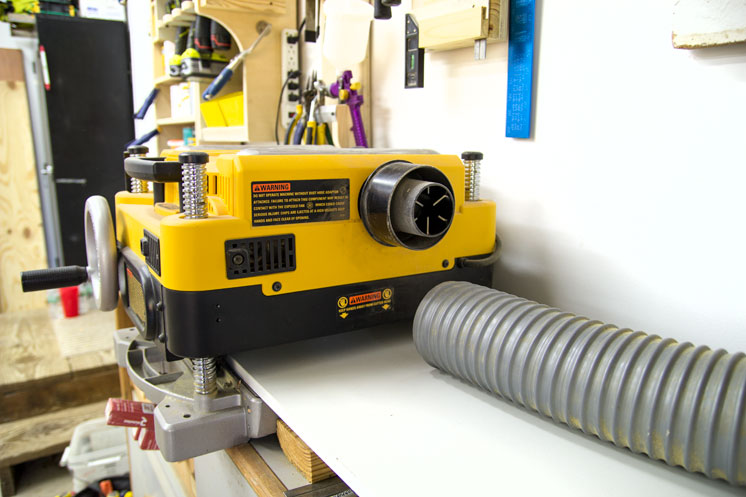
- Fan powered chip ejection with grit collector hookup. It too has a smaller port adapter that I suppose will fit a shopvac. I don't have a shopvac so I can't speak for that part. The fan motor is a beast though. You lot don't demand a dust collector with this setup. Just pipe the exhaust port into a filter bag. I'll get into that later in this article.
- Benchtop model so technically it is portable. But at that place is a caveat with this…
- Readily available upgrades and options on the internet (blades, helix option, infeed outfeed tables).
- Snipe is controllable.
Thumbs Down:
- It's a benchtop planer but the fact that it weights 92 pounds makes information technology a lot less mobile. Yep, you lot tin pick it upward and motion information technology but it's definitely a "fix it and forget information technology" planer in my opinion.
- It's quite expensive for a benchtop model. At the time of writing this article you can go information technology for about $500 USD.
- The DeWalt make blades accept a very low lifespan. I don't utilize mine that often and after ii years im on my third set of blades. At $55 per fix this tin get expensive.
- You can't sharpen the blades as they are installed via index pins that exercise not allow summit aligning. Some have said they have sharpened theirs but I've had no luck.
- A lot of people have had issues with the rollers non properly feeding the fabric. I've never had this problem but I take as well modified the bed slightly which would reduce this.
- Right out of the box, snipe is horrible.
Should YOU Buy This Planer?
While I do accept Amazon affiliate links on this folio in the slim take a chance that someone actually purchases information technology through me…..I'chiliad not going to tell you that you lot should or shouldn't buy anything. That's non my decision to make. I honestly don't care and have zero to gain or lose from DeWalt if you practice or do non buy this planer. It'southward an investment that you demand to enquiry, evaluate, and determine on your own. That being said, I would non purchase this planer if I had to do it again. The reason being is purely fiscal and has null to do with the great performance of the motorcar. The DW735 is a coin pit in my stance. It's not a one time investment due to the cost of the poor quality, non sharpenable replacement blades. I understand that with every planer you volition eventually take to buy new blades just these take an incredibly curt lifespan that cannot be stretched due to not being able to sharpen the blades. Yes, you could upgrade to carbide blades but fifty-fifty then its a larger investment. Yep, you lot could upgrade to a helical cutterhead for the planer simply even so y'all are nearly doubling the cost of the car. I've got nearly $650 in information technology after ii years. If I were to do it over again I would take i of 2 paths. Either purchase a much cheaper benchtop planer that allows sharpening of the blades and use the extra money on another tool for the shop or save up a hundred more and become a Steel City helical cutter head benchtop planer.
My Planer Setup
On with the prove. I've had my planer sitting on top of a junk dresser I plant in the trash for about a twelvemonth and a half now. I love this setup and highly recommend it for anyone who is looking for a decent planer setup and has the room. Either build or find a dresser shaped piece of furniture. This allows a perfect shaped elevation surface for the planer to be secured to and practise it's work. And also, because there are drawers below it's a great way to utilize storage space in the store.
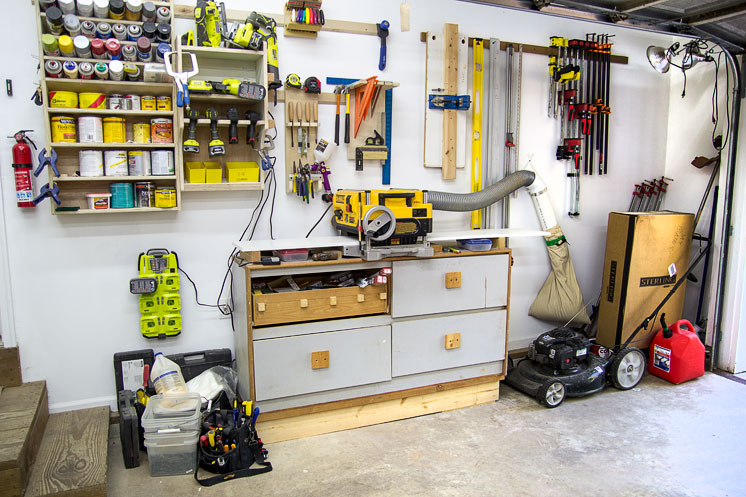
I didn't take any exact measurements just I believe my dresser is about 5 anxiety long. On the top I have two chunks of 2×four screwed downwardly to the pinnacle of the dresser directly on the front and dorsum side of the planer. This prevents the planer from sliding without actually screwing or bolting it to the dresser. On the ends of the dresser I have two more chunks of ii×4 to support an auxiliary bed that I use through the planer.
To extend the bed of the planer I used a 6′ piece of melamine shelving and slid it through the planer. To secure it I have 1 spiral through the melamine and into the chunk of two×4 on both ends of the dresser.
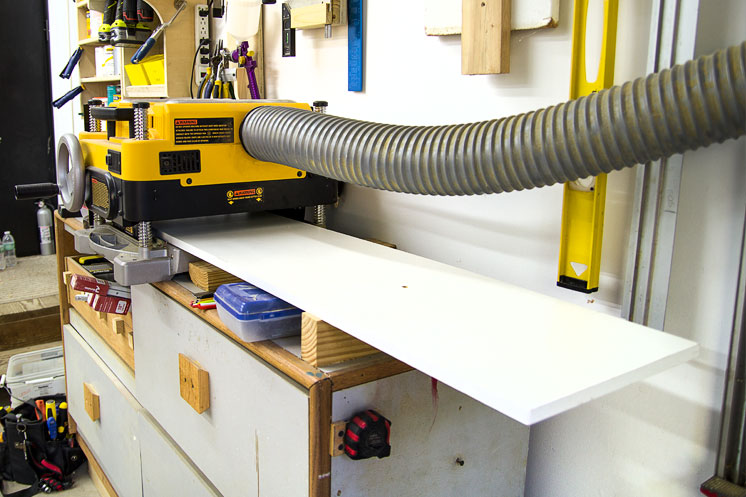
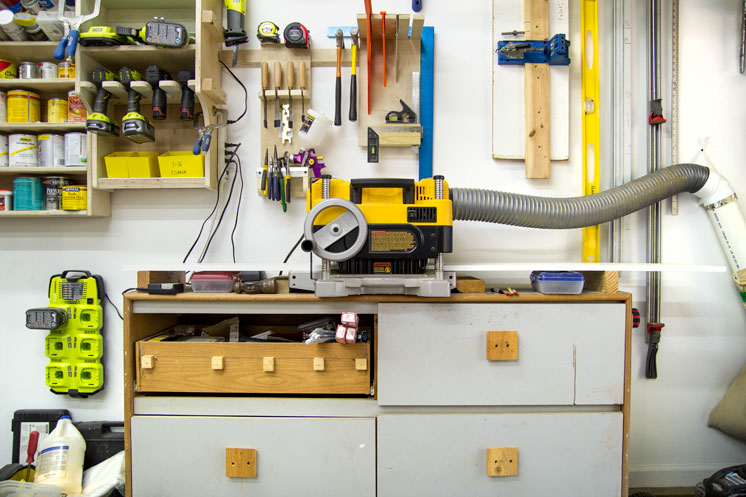
As mentioned earlier, there is a 4" dust port on the back of the planer that makes dust drove a breeze even without a dust collector. I use a brusque slice of Harbor Freight 4" dust collection hose here. No clamps needed. Just slide information technology on and forget nearly information technology. I've never had it come off during apply even when my collection bag was full.
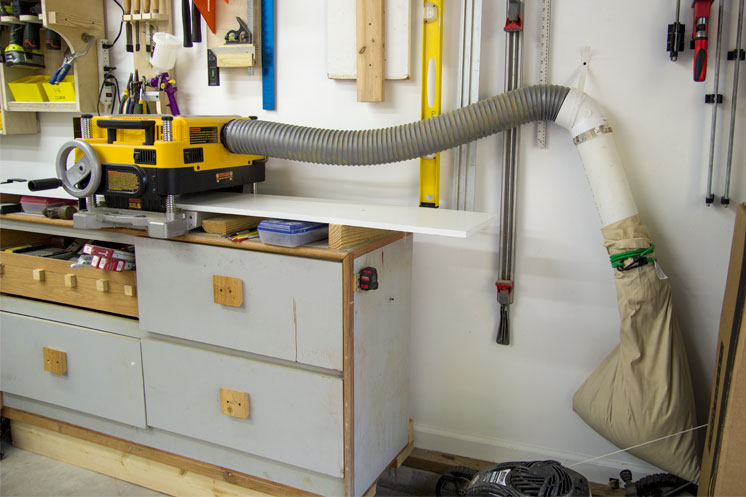
The flexible hose goes to a 4" sewer and drain 45 caste PVC fitting. From at that place a brusk department of iv" pipe is used with the bell end on 1 side. A regular pillow case is so secured to the pipage with a bungee string. This is past no means a depression micron grit filtration pick but I discover that nearly all of the waste from a planer is larger fries and this pillow case does a fantastic job at property it all. Even with the purse total the planer has no problem shoving more than chips into the handbag and slightly compressing what is in there. All the junctions in the flexible hose and PVC are all sideslip connections. Zip is secured with tape or clamps.
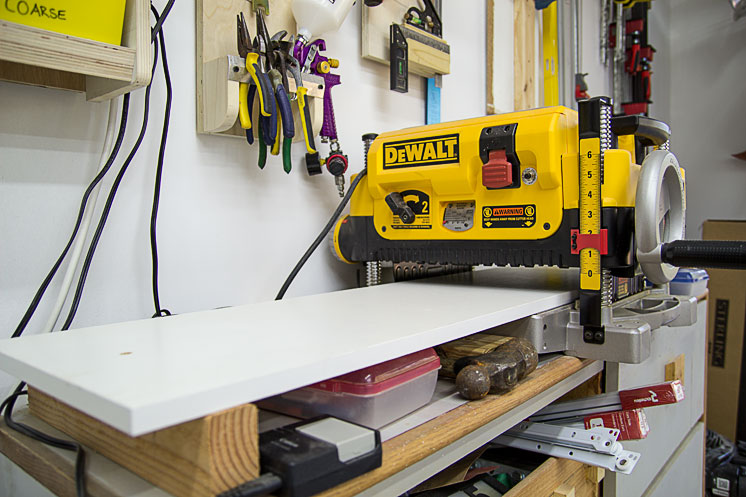
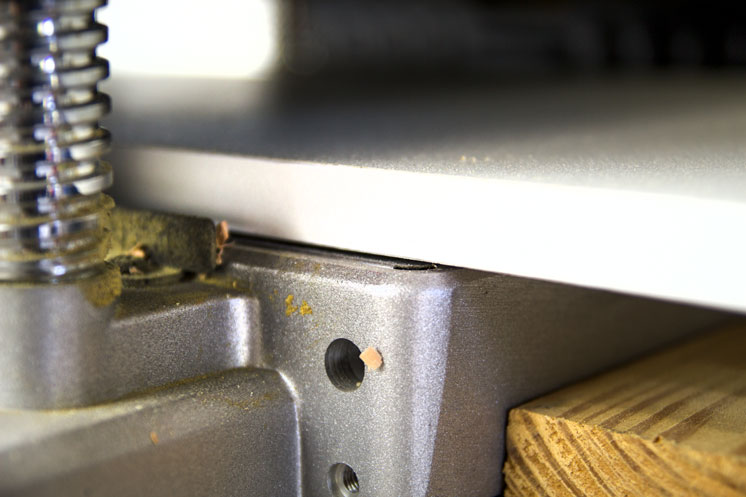
Subsequently playing around with the planer shortly after assembling this setup I completely eliminated snipe. And so gradually snipe returned on the infeed side of the cuts. It wasn't until I took pictures for this commodity that I realized why. To reduce snipe anybody recommends ramping up the infeed and outfeed sides of this planer. That only works if you have auxiliary tables. So what I did was I cut my support blocks for the melamine shelving most 1/8" higher than the bed top of the planer.
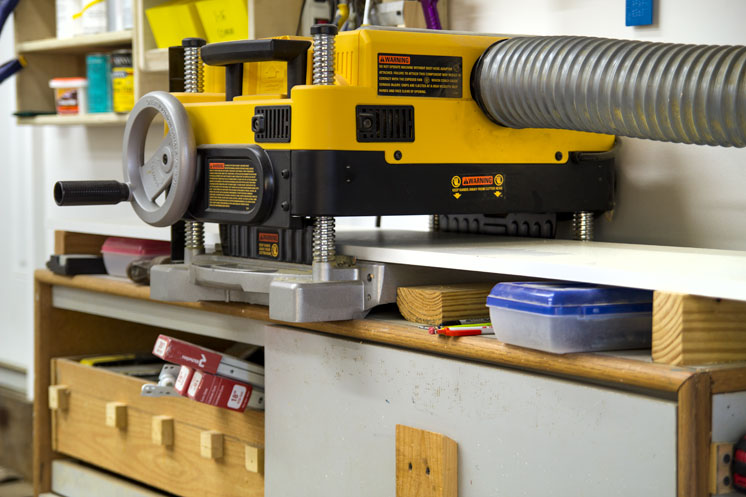
Information technology's hard to notice at first simply here you tin can encounter the outfeed side of the melamine auxiliary bed. At the planer the melamine is slightly more than ane/sixteen" higher than the original bed. Something must have settled considering I just noticed on the infeed side the melamine bed was bottomed out on the planer bed. That means I just need to shim the ii×4 support block on the infeed side and snipe should be reduced or eliminated again. Because the auxiliary bed is essentially suspended a slightly greater force is needed by the rollers to push button the fabric through. I've never had any bug with the rollers not feeding the material through equally they should with this setup.
Well I hope that helps out in some way. You can do this with any planer and I'm sure it will help out with snipe. If you lot found this article useful I'd dearest for you to share it for others to find helpful as well. Helping me reach more people profoundly helps me to produce more free content in the long run. Thanks, good luck, and have a slap-up twenty-four hours!

How To Set Up Dewalt Planer,
Source: https://jayscustomcreations.com/2014/09/my-dw735-planer-setup-and-thoughts/
Posted by: goodwinwhiser.blogspot.com
0 Response to "How To Set Up Dewalt Planer"
Post a Comment